Get Started with Wix Editor
When you create a new site, you can choose if you want to build it using Wix ADI (Artificial Design Intelligence) or Wix Editor.
ADI: Let Wix ADI Create a Website for You
Answer a few questions to get started! Wix ADI uses this information to automatically create a unique website for you by combining the best content and design elements. Once your site is ready, you can add your own images, customize the text, and more.
Editor: Get Started with One of Our Stunning Templates
Choose from one of our stunning templates and customize it the way you want. You can drag and drop elements such as text boxes, shapes, images and more.
In general, Wix Editor supports the following features which are not available under Wix ADI:
-
HTML code element
-
Embed a site element
-
PayPal buttons
-
Music players
-
Documents
-
Webmaster and Member login buttons
-
Wix Hotels
-
Wix Restaurants
-
Wix Photo Albums
-
Apps from the App Market (Wix ADI only supports 4 apps: Wix Chat, Wix Blog, Wix Booking and Wix Stores)
(Note: Not all the above functions are available under the "Unlimited" plan subscribed by ITS.)
If you are looking for a more feature-rich website and a basic "canned" website may not fit your needs, Wix Editor is a good choice for you. It can deliver a more than "customized" website if you can spend more time in setting it up.
To use the Wix Editor, please familiarize yourself with the Wix Editor interface. Through this interface, you can design the header/body/footer, add new pages, manage the page menu, configure the website domain name, set SEO (Search Engine Optimization) and website statistic tool to boost the visiting frequency of a website. Convenient tools such as site history and duplicate site are available handily. The website can be further enriched by using Wix Code and Wix App Market.

Wix Editor Interface

Related Guide:
Header
Header Design
1.Click Change Header Design

2. Choose a preset design or Click Customize Design
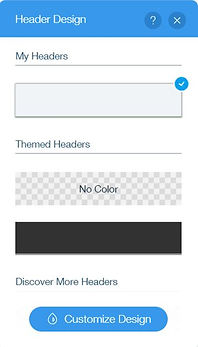
3. Choose a design and edit the style under the selected design.

Related Guide:
Menu Design
1. Menu will be displayed at the header by default. You can click Add button (the third icon) on the left menu and Menu to add a menu

2. You can edit the Menu layout and design.

Related Guide:
Upload Image as Logo
1. Click Add button (the third icon) on the left menu. Then click Image and My Image Uploads.

2. Click Upload Images and select an image from your PC.
3. Click Add to Page.
4. Drag the uploaded image to the preferred Header area and stop until you see the Attach to Header button.

Related Guide:
Body
Strip
Strips are blocks holding elements such as images or texts. Contents in the blocks can be moved easily.
Add Strips to page:
-
Click Add button (the third icon) on the left menu.
-
Click Strip.
-
Select and click the preferred Strip design.

Move Strips:
-
Click Zoom out icon.
2. click Move up / Move down arrows to reorder the contents.

Related Guide:
Edit Background
Edit Pages Background:
-
Click Background (the second icon) on the left menu.
-
Choose Color, Image or Video. You can also upload your own image or video.
-
Click Settings if you wish to change the style of the image or video.
Edit Strips Background:
If you have added a Strip, you can edit its background by the following steps:
-
Click the Strip added.
-
Click Change Strip Background.

3. Choose Color, Image or Video. You can also upload your own image or video.
4. Click Settings if you wish to change the style of the image or video.


Related Guide:
Slideshow / Banner
You can add slideshow to promote your site or event.
-
Click Add button (the third icon) on the left menu.
-
Click Interactive.
-
Click a slideshow to add.

You can add Title here
and have description here
Related Guide:
Text, Button, Image and Box
You can add Text, Button, Image (max.15MB), document (max.15MB) and video (max. 250MB) using the options under Add button (the third icon) on the left menu. You can consider using Box to include these elements which can facilitate editing such as moving and alignment.

How to Add, Edit, Customize & Link Text
How to Add, Link & Customize Button
Related Guide:
Lists and Grids
List and Grids include Repeater and Table.

Repeaters help you reduce the works in aligning and editing items that share the same design in background, images, text, shapes and buttons. You however cannot put repeaters inside repeaters.
Repeaters can display Dynamic Data. Click here to see how it works.

Data in a table has to be stored using a Wix Database. Table cannot be created by simply inputting the data in a table such as that in MS Word.
By connecting to a Wix database, you can display dynamic data and define the action upon clicking a row or a cell. Click here to see how it works.
Title | ReleaseDate | details | image |
|---|---|---|---|
Wix Bookings: Let Clients View Your Services without Booking | 29/10/2018 | Want to showcase your services without having clients book you? Now you can. Simply create a view-only service with a link for more info. | |
Wix Editor: Header Effects Are Available for Desktop | 01/11/2018 | Decide what happens when visitors scroll. For example, you can set your header to freeze, fade out or disappear. | |
Wix Editor: Auto Pin to Screen | 01/11/2018 | It's a little easier to make an item visible at all times, even as visitors scroll through your site. | |
Wix Now Supports iOS 11 & Above | 04/11/2018 | Wix now only supports websites on iPads or iPhones with iOS 11 and above. | |
Wix Editor: Crop Your Image into a Shape | 05/11/2018 | Do more with crop! Now you can crop an image into a shape, reset the shape proportions and flip the shape horizontally or vertically. Simply click Crop and then choose Shape Crop.
| |
Resolved: October 31, 2018 - Old Blog Pages Weren't Showing on Wix ADI Sites | 05/11/2018 | Resolved: On October 31st, 2018, there was a technical issue where old blog pages were not showing on Wix ADI websites. We apologize for any inconvenience. | |
Wix Editor: Upload Fonts for Wix Chat | 05/11/2018 | Upload your font to the Editor and use it for your chat. | |
Wix ADI: Choose the Color Behind Your Images | 05/11/2018 | Creating your website with Wix ADI? Now you can pick a color from your site's color palette.
|
Related Guide:
Footer
Contact Us
You can add a Contact Tool to enable visitors to send you their contact information and question. Map showing a contact location can also be added using this tool.

To add a contact form:
-
Click Add button (the third icon) on the left menu and select Contact.
-
Select the tool you wish to add.
- Click Manage Fields to edit fields.
- Click the + Add New Field button to add more fields such as Name, Email, Phone No. and Subject. You can also add a field with a customized name.
- Click Make Mandatory if the field is a compulsory.

6. Click Setting icon (the gear button) to change the receiver email for this contact form.

To add a map:
1. Select the map you wish to add e.g. Google Map
2. Click Settings icon (the gear button) to set the location and other map details.

3. Click Design icon (the pen icon) to change the map design.

Related Guide:
Social Tool
1. Click Add button (the third icon) on the left menu and select Social.

2. After making a selection, click Set Social Links to edit link or add new social icon.


Related Guide:
Page
Page / Anchor
Add page:
Click Add Page to add a new page with header and footer or a blank page under the Menu bar.

Use anchor to point to a specific location in a page. (HOW??)
Please note that Folder is different from Page or Anchor. Clicking Folder will not show any contents.
Below gives an example. Clicking the Page button will link to the designated web page while clicking the Folder button will give no response.

Related Guide:
Dynamic Page
Dynamic page is an advanced function. By making use of a Database, pages in the same layout can display the predefined records under the Database dymanically.
1. Turn on Developer Tools under Code at the top menu.

2. A new option Dynamic Pages will appear under Menus & Pages on the left menu.
3. Set up database collection based on your needs.

Related Guide:
Wix Code
Wix Code is an innovative new product that lets you build robust web applications with all of the stunning visual features of the Wix Editor.
This is an advanced feature of Wix that requires some programming knowledge. It will be used when setting up Database and Dynamic Page.
Related Guide:
Wix App Market
The Wix App Market is filled with over 250 popular web apps, powerful services and amazing features to enhance your website and grow your business. Most of the apps are free to use, mobile optimized and easy to add to your site in just a few clicks.